A severe storm warning sounds at night, the power goes out, and you need a place in or near your home that is dry, ventilated, and safe to reach in minutes. That is the problem a household shelter is meant to solve. The question is not how large or elaborate a shelter can be. It is whether the room you head for will hold up, let you breathe, and keep you supplied until it is safe to come out.
Many shelter projects go wrong before construction starts. A site is picked because land is available, not because it drains well and can be reached quickly. Money goes to finishes before ventilation, drainage, and a door that works under load. Permits and design standards get skipped, which can create trouble with insurers and future buyers. Planning first, and building second, avoids most of those traps.
Quick Answer
Start with the hazard you face, then choose a shelter type built to a recognized standard, with ventilation, water, sanitation, and power planned before finishes. For most homes, a certified above-ground safe room or a reinforced interior room is the practical starting point. Check permits, soil, and drainage first, and hire licensed professionals for structural work.
What a Bunker Is and What It Is Not
A bunker, a storm shelter, and a safe room are related but not identical. A storm shelter is usually designed to resist tornadoes or hurricanes. A safe room is a reinforced room inside or attached to a home, built to a recognized standard for wind and impact resistance. A bunker is the broader word readers often use for any hardened shelter, including a buried structure or a reinforced basement room.
The distinction matters because it affects design, cost, and permits. A family in a tornado-prone region may need wind and debris resistance above all else. A family in a wildfire zone may care more about ember protection, air filtration, and a clear evacuation route. A family planning for a long power outage may care most about water storage, sanitation, and backup power. Defining the main hazard first keeps the project focused and prevents spending money on features that do not match the real risk.
A bunker is also not a substitute for evacuation. When officials order an evacuation, leaving early is usually safer than sheltering in place. A shelter is best understood as one layer of a wider emergency plan, alongside early warning alerts, a go bag, a family communication plan, and a practiced route out of the area.
FEMA describes a safe room as a hardened space built to its design guidance, with FEMA P-320 covering residential safe rooms and P-361 covering design, construction, and operation in more detail. Building codes use the term storm shelter for a structure built to ICC 500, the standard for the design and construction of storm shelters. When a contractor promises a certified rating, ask which standard the rating refers to, and ask for the documentation in writing.
Step by Step: How to Plan a Household Shelter
Step 1: Define the hazard and the stay
Write down the main hazard, how long you would realistically need to stay, and who would use the shelter. A shelter meant for a few hours during a tornado needs far less storage than a shelter meant for several days without power. Longer stays need more water, more food, better sanitation, better ventilation, and a way to manage heat, humidity, and waste. Planning for a realistic duration, rather than an open-ended worst case, keeps the project affordable and the supplies fresh.
Step 2: Choose the shelter type
Most residential shelters fall into three broad categories, each with a very different cost profile.
Above-ground safe rooms. A reinforced room built inside a home, in a garage, or as a separate outbuilding, with strengthened walls, ceilings, doors, and frames. Because the room sits at ground level, access is simple, which is a major advantage for older adults, children, and anyone with limited mobility. Safe rooms also avoid many of the problems that come with digging, such as groundwater, soil pressure, and drainage failures. They are easier to inspect, easier to ventilate, and easier to connect to household power and water. The trade-off is floor space. A safe room takes up living area, and a detached unit still needs a foundation, a roof, and protection from the same storm it is meant to survive. For many households, a safe room is the most practical first option. It can double as a closet, bathroom, or storage room, and it can be used quickly because no stairs or outdoor trip is involved.
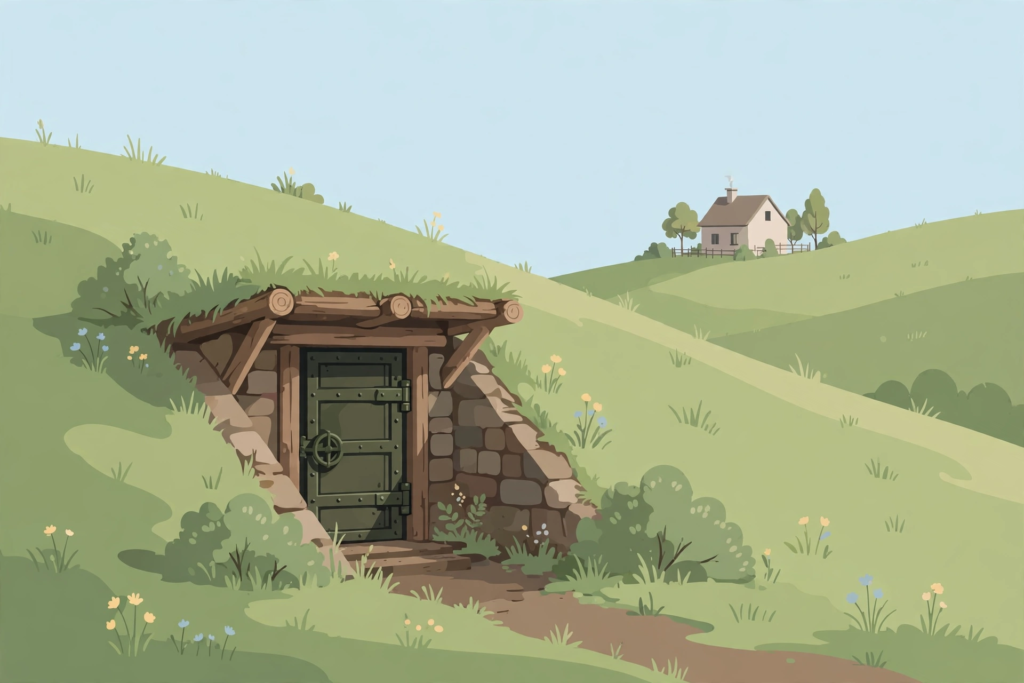
Buried shelters. A shelter below ground level, either fully underground or bermed into a hillside. Earth cover provides natural insulation, temperature stability, and protection from wind and debris, and a buried shelter does not take up living area. Buried construction is also the most demanding option. Soil exerts pressure on walls and roofs, groundwater can seep in or flood a structure, and access depends on stairs, a hatch, or a sloped entry that must stay clear in bad weather. Ventilation, drainage, waterproofing, and emergency exit planning all become more complex underground. That complexity is why buried shelters almost always need professional design and licensed installation rather than a do-it-yourself approach. A buried shelter should have at least two ways in and out where the site allows it. A single hatch can be blocked by debris, snow, or a fallen tree, and an exit that only opens from the inside is of little use if the main entry is buried.
Converted basements and interior rooms. Converting an existing basement corner or interior room is often the lowest-cost path to a safer space. A basement already sits below grade, which gives it natural protection from wind, and an interior room on the lowest floor, away from windows and exterior walls, is the standard advice for sheltering during a tornado when no dedicated shelter exists. A conversion usually means reinforcing walls and ceilings, adding a solid-core or steel door with a strong frame, sealing gaps, and improving ventilation and lighting. It does not automatically make a room a certified storm shelter. True certification depends on meeting a recognized design standard and passing inspection, so ask a contractor what standard a proposed conversion will meet rather than assuming any reinforced room qualifies.
Step 3: Pick a location you can reach in minutes
Location is the single most important planning decision. A shelter should be close enough to reach in a few minutes, even at night and in bad weather. A long walk across a yard, down a muddy slope, or through a locked gate can turn a safe shelter into a shelter nobody reaches in time.
For an above-ground or basement option, the best location is usually near bedrooms or a central living area. For a buried shelter, the best location balances access, drainage, and distance from hazards. It should sit above the seasonal high water table where possible, away from septic systems, buried utilities, fuel tanks, and large trees whose roots or falling limbs could cause damage. It should also be reachable without crossing a flood-prone low spot. FEMA guidance for residential safe rooms also notes that a detached safe room should be close to the home, with 150 feet often cited as the practical limit for quick access.
Step 4: Check soil, water table, and drainage
Soil type and groundwater shape almost every buried shelter decision. Clay soils expand and contract with moisture and push hard against walls. Sandy soils drain well but may not hold a shape during excavation. Rocky ground raises excavation cost and can complicate drainage. A geotechnical report, often called a soil report, gives a professional picture of what lies below a specific property, and it is money well spent before a buried project is priced.
The water table is the level below which the ground is saturated with water. A shelter built below the seasonal high water table faces constant pressure from groundwater and a higher risk of leaks or flooding. Builders manage this with waterproofing, exterior drainage, and pumping systems, but those systems need power, maintenance, and a backup plan if power fails. In areas with a high water table, an above-ground safe room is often the wiser choice.
Step 5: Size the shelter for people, pets, and supplies
Shelter size should be based on the number of people who will actually use it, plus a margin for guests, pets, and supplies. Cramped shelters are stressful, and stress makes emergencies harder. Allow enough floor space for each person to sit and lie down, plus separate space for stored water, food, sanitation supplies, and equipment.
FEMA residential guidance uses about 3 to 5 square feet per person for short tornado sheltering, and about 7 to 10 square feet per person when people may need to stay for hours in more comfort. Those figures are minimums for floor area, not targets for a comfortable room. A room that meets the minimum on paper can still feel cramped once supplies, seating, and a toilet plan are added, so size up where the budget allows.
Step 6: Plan ventilation, water, sanitation, and power together
Ventilation and air quality. Ventilation is a life-safety system, not a comfort extra. People consume oxygen and produce carbon dioxide, heat, and moisture, and a sealed shelter without fresh air becomes dangerous surprisingly quickly. Every shelter needs a ventilation plan sized for its occupancy and expected duration. Above-ground safe rooms can often use passive vents, a connection to the home heating and cooling system, or a dedicated fan. Buried shelters need a more deliberate design, usually with intake and exhaust vents placed so air moves across the occupied space. Vents should be protected from debris, water, snow, and pests, and they should be reachable for inspection and cleaning. Some shelters add air filtration for smoke, dust, or airborne contaminants. Filtration can help during wildfire smoke or dusty conditions, but filters need replacement, fans need power, and a filtration system should never be treated as a substitute for evacuation during a chemical or hazardous-materials incident. In those events, official guidance to leave the area should be followed.
Water, food, and sanitation. Water is the most important supply in any shelter. Ready.gov, the United States federal emergency preparedness site, advises storing at least one gallon of water per person per day for drinking and sanitation, with more needed in hot weather, for longer stays, and for pets. Stored water should be rotated on a schedule, kept in clean sealed containers, and stored where it will not freeze or overheat. Food planning should favor items the family actually eats and can prepare without a full kitchen. Shelf-stable meals, canned goods, dried foods, and snacks with a long shelf life are practical choices. Include a manual can opener and basic utensils. Any cooking that produces carbon monoxide, such as a portable fuel stove, must never be used in a sealed underground space. Follow the equipment instructions and the shelter designer guidance on what is safe to use inside. Sanitation is often overlooked until it becomes urgent. A shelter used for more than a few hours needs a toilet plan, waste bags, hand hygiene supplies, and a way to store waste safely until it can be disposed of properly. Portable toilets, bucket systems with liners, and hygiene kits are common low-cost solutions. Privacy matters too, especially for families sheltering together for days. A simple curtain or screen can make a difficult situation more bearable.
Power, lighting, and communication. Power planning starts with a simple question: what must keep working if the grid goes down? For most shelters, the answer is lighting, ventilation fans, phone charging, and possibly a sump pump or a small refrigerator for medication. Everything beyond that is optional and should be weighed against cost, fuel storage, and safety. Battery systems are the simplest backup option. Rechargeable battery banks, flashlights, headlamps, and a hand-crank or battery radio cover most short stays. Larger battery systems can run fans and lights for longer, especially when paired with solar panels, but they need proper installation, ventilation for the battery location, and a realistic estimate of how long they will last under actual load. Generators can extend a shelter endurance, but they come with strict safety rules. Fuel-powered generators must run outdoors, away from windows, doors, and vents, because exhaust contains carbon monoxide, a colorless and odorless gas that can kill. A generator should never run inside a shelter or a garage, even with a door open. Carbon monoxide detectors with battery backup belong in any shelter where combustion equipment, vehicles, or attached garages are nearby. For a closer look at backup power costs, see the Factaxy guide to how much a whole-house generator costs.
Step 7: Confirm permits, codes, and contractors before building
Permits confirm that a structure meets safety standards, that it sits legally on the property, and that future buyers and insurers can verify what was built. Most jurisdictions require permits for new structures, structural changes, electrical work, and plumbing work, and buried structures often trigger additional reviews for setbacks, easements, utilities, and drainage.
Start with the local building department before hiring a contractor or ordering a unit. Useful questions include whether a permit is required, which design standard applies, what inspections are needed, and whether the property has easements, floodplain restrictions, or homeowners association rules that affect placement. A reputable contractor will be familiar with these requirements and should be willing to handle the permit process or explain it clearly.
Verify licenses, ask for references from similar projects, confirm insurance coverage, and get a written contract covering scope, materials, design standard, inspection milestones, warranty, and payment schedule. Be cautious of any builder who discourages permits, refuses to provide documentation, or promises a certified rating without naming the standard behind it. Underground utilities deserve a specific warning. Digging without checking for buried gas, water, sewer, electric, and communication lines is dangerous and, in many places, illegal. Use the local utility-location service before any excavation, and keep the confirmation record with the project file.
Insurance is part of the same conversation. A certified shelter can affect coverage and claims after storm damage, so it is worth reading the Factaxy guides to whether homeowners insurance covers winter storm damage and to flood insurance before assuming a shelter is covered.
Step 8: Build for the whole assembly, not one strong part
At the planning level, the right materials depend on the shelter type, the hazard, the soil, and local code, and a structural engineer should specify them. Above-ground safe rooms commonly use reinforced concrete masonry, poured concrete, or steel panels with heavy-duty doors and frames. Buried shelters commonly use reinforced concrete, steel, or fiberglass structures designed for underground loads. Converted rooms rely on reinforcing existing walls and ceilings and upgrading the door and frame.
What matters more than any single material is that the whole assembly works together. Walls, roof or ceiling, door, frame, hinges, and anchoring all need to meet the same standard. A strong wall with a weak door is a weak shelter. Ask for the design standard being followed, the load ratings for doors and panels, and written documentation that can be shown to an insurer or a future buyer.
Step 9: Plan safety, maintenance, and drills
Safety planning covers construction, daily use, and emergencies inside the shelter. During construction, excavation must be shored and managed by professionals, heavy equipment needs clear access, and children and pets should be kept away from the work area. After construction, inspect the shelter on a schedule, with attention to water intrusion, mold, pests, door operation, vent blockages, and battery condition.
Fire safety needs attention in any enclosed space. Smoke and carbon monoxide detectors with battery backup, a fire extinguisher rated for the shelter contents, and a clear exit path are sensible basics. Flammable liquids, fuel, and large quantities of combustible storage should not be kept inside an occupied shelter unless the design specifically allows for them with proper ventilation and separation. Security is a balance. A shelter door should be strong and lockable, but it must always be openable from the inside without a key, a tool, or special knowledge. Anyone sheltering inside should be able to leave quickly in a fire or a medical emergency. Locks that trap occupants inside are a hazard, not a feature.
A shelter is a long-term asset, and it needs a maintenance routine. A seasonal inspection should check the door and hinges, vents and filters, drainage and sump operation, waterproofing, batteries, detectors, and stored supplies. After any major storm, check the shelter again, even if it was not used, because storms can block vents, damage entries, and shift drainage patterns. Practice a calm drill with the whole household, including at night, and keep permits, warranties, inspection records, and supply rotation dates in one file.
Worked Example: A Four-Person Household Planning a Three-Day Stay
This is an illustrative example, using the planning figures given above, to show how the numbers add up for one household.
A household of four people, plus one dog, plans for a three-day stay without grid power. Water comes first: one gallon per person per day for three days is 12 gallons for the people, plus extra water for the dog and for hygiene, so the household plans on about 15 gallons stored in sealed containers. Food is shelf-stable meals and snacks the family already eats, with a manual can opener. For floor area, four people at 7 square feet each for a longer, more comfortable stay comes to 28 square feet as a bare minimum, but an 8-foot by 8-foot room gives 64 square feet, which leaves room for water containers, a toilet plan, seating, and a small equipment shelf without crowding the occupants.
For cost, FEMA homeowner guidance examples put a small prefabricated safe room at as little as about $3,000, a 14-foot by 14-foot safe room at about $14,000 to $17,000, and new-construction safe rooms starting at around $6,000, with larger or more finished designs costing more. Those are published examples, not quotes. The household in this example budgets for a mid-range above-ground safe room, then gets written quotes from licensed contractors for its own site, because soil, foundation work, door type, and region move the final price. A backup power plan covers lights, a ventilation fan, and phone charging from batteries, with a generator kept outdoors only. The household also keeps a separate emergency fund for repairs and supply rotation, as covered in the Factaxy guide to how much emergency fund you need.
Planning Checklist
- Define the main hazard and the realistic shelter duration.
- Choose the shelter type that fits the hazard, the site, and the budget.
- Pick a location that can be reached quickly, safely, and by everyone in the household.
- Check soil, water table, drainage, flood risk, and underground utilities.
- Confirm permits, setbacks, easements, and the applicable design standard.
- Hire licensed contractors and get written quotes, warranties, and inspection milestones.
- Plan ventilation, water, sanitation, lighting, and backup power together, not as afterthoughts.
- Include at least two exits where the site allows, and ensure doors open from the inside.
- Stock water, food, medications, first aid, hygiene, communication, and pet supplies.
- Install smoke and carbon monoxide detectors with battery backup.
- Practice a calm drill with the whole household, including at night.
- Schedule seasonal inspections and supply rotation, and keep all records in one file.
Common Mistakes to Avoid
The most common mistake is building in the wrong place. A shelter far from the house, below the water table, or in a flood-prone hollow will be hard to reach or wet when it matters. The second most common mistake is underestimating ventilation and drainage. Both are invisible when the shelter is new and unforgiving when they fail.
Another frequent mistake is spending the budget on finishes before systems. Comfortable seating and shelving are pleasant, but they do not substitute for a working door, clean air, dry walls, and safe power. A related mistake is overstocking with supplies nobody rotates. Expired food and dead batteries give false confidence. A further mistake is treating a reinforced room as certified when no standard was named and no inspection passed. Ask for the standard, the test results, and the inspection record.
Pros and Cons of a Household Shelter
Pros
- A dedicated shelter can be reached in minutes, day or night, without driving anywhere.
- A certified safe room is designed and tested against wind and debris, rather than improvised.
- An above-ground room can double as a closet, bathroom, or storage room when not in use.
- Stored water, food, and power reduce dependence on shops and the grid during a short outage.
- Permits and inspection records can help with insurance claims and resale.
Cons
- Costs vary widely by site, size, and standard, and buried options are usually the most expensive.
- Buried shelters face groundwater, drainage, and access problems that need professional design.
- A shelter needs ongoing inspection, supply rotation, and battery replacement to stay ready.
- A shelter does not replace evacuation when officials order people to leave.
- An undocumented or uncertified structure can create insurance and resale problems.
Frequently Asked Questions
Is a buried shelter always safer than an above-ground safe room?
Not necessarily. Safety depends on the hazard, the site, and the design standard. A certified above-ground safe room on a high-water-table property is often safer than a buried shelter that floods. A buried shelter on a well-drained site with professional design can be excellent. The right answer is site-specific.
How long should supplies last?
A sensible starting point is enough water, food, and essentials for at least three days for every person and pet using the shelter, with more for longer planned stays. Emergency agencies commonly recommend a three-day minimum for household preparedness, and families in remote areas or regions with slow recovery times may plan for longer.
Can a shelter be built without a permit?
In most places, structural work, new structures, and electrical or plumbing changes require permits, and skipping them risks fines, insurance problems, and resale complications. Always check with the local building department before starting work.
Does a bunker increase home value?
It can, especially a certified storm shelter in a storm-prone region, but the effect varies by market, documentation, and buyer preferences. Permits, inspection records, and a transferable warranty make a shelter more attractive to buyers than an undocumented structure.
Where can I check official shelter and supply guidance?
FEMA publishes safe room guidance for residential and community shelters, and Ready.gov publishes household supply lists, including the one-gallon-per-person-per-day water figure used in this guide. Both are linked in the sources below. Local building departments remain the authority for permits and codes on a specific property.
Sources
Closing
Learning how to build a bunker is mostly about making careful decisions before construction begins. The households that end up with a useful shelter are the ones that defined their hazard, chose a realistic shelter type, checked their site and local rules, hired qualified professionals, and kept the shelter stocked and maintained afterward.
A shelter does not need to be large, elaborate, or expensive to be useful. A dry, ventilated, accessible room with a strong door, stored water, basic supplies, and a practiced plan will serve a family far better than an ambitious project that is damp, hard to reach, or forgotten after it is built. Start with the plan, get professional help for the structure, and treat readiness as an ongoing habit rather than a one-time purchase.